
If you care about flawless makeup and healthy skin, learning how to deep clean makeup brushes is non‑negotiable. Deep cleaning removes stubborn product buildup, oil, and bacteria that quick spot‑cleaning can’t reach, so your brushes stay softer, last longer, and perform like new.
This guide breaks down exactly how to deep clean makeup brushes step by step, what products and tools to use, how often to do a deep clean, how to dry them safely, and the most common mistakes to avoid.
Why You Must Deep Clean Makeup Brushes
Deep cleaning makeup brushes is about far more than appearance or brush longevity.
- Every time you use a brush, it picks up sebum, foundation, sunscreen, dead skin cells, and environmental dirt. Without regular deep clean makeup brushes sessions, that residue becomes a breeding ground for bacteria that can contribute to breakouts and irritation.
- Dirty brushes don’t blend properly. Product builds up at the base of the bristles, so your foundation streaks, powders go patchy, and eyeshadow looks muddy no matter how good the formula is.
- Most dermatologists and makeup brands recommend cleaning liquid and cream brushes at least once a week, and powder brushes every 1–2 weeks. For working artists, how to deep clean makeup brushes is part of basic hygiene, not an optional extra.
What You Need to Deep Clean Makeup Brushes
You don’t need a huge kit to set up a professional‑level deep clean makeup brush routine—just a few well‑chosen basics.
Lukewarm water
Hot water can soften glue in the ferrule and damage natural hair. Always use comfortable, lukewarm water when you deep clean makeup brushes.
Gentle cleanser
- Dedicated brush cleansers (liquid, gel, or solid cakes)
- Or mild shampoo, baby shampoo, or a fragrance‑free dish soap plus a drop of plant oil for heavy cream products
The goal is to dissolve oil and pigment without stripping or drying the bristles.
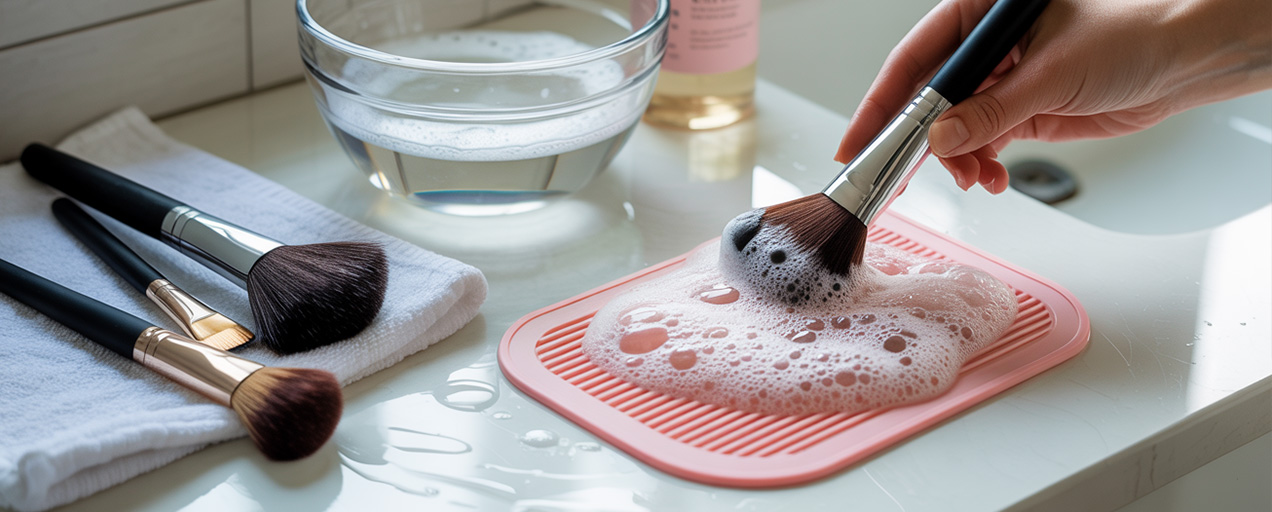
Textured cleaning mat or board
Silicone cleaning pads with ridges make it easier to deep clean makeup brushes thoroughly, especially dense foundation and concealer brushes.
Clean towel or microfiber cloth
For blotting excess water and supporting brushes while they dry.
Optional extras
A drying rack or brush tree (so bristles face downward), brush guards to maintain shape, and 70–90% alcohol spray for occasional extra disinfection—especially helpful for professional kits.
✨ Step‑by‑Step: How to Deep Clean Makeup Brushes
This workflow is designed so you can use it weekly at home or nightly as a pro after a long day with clients. Follow each step and how to deep clean makeup brushes will quickly become second nature.
Step 1: Sort and Inspect Your Brushes
- Separate your kit into liquid/cream brushes (foundation, concealer, cream blush, lip, etc.) and powder brushes (powder, blush, bronzer, highlighter, eyeshadow).
- Quickly inspect for severe splaying, shedding, or ferrules that are already loose. If a brush still looks rough even after you deep clean makeup brushes, it may be time to retire it.
Step 2: Wet the Bristles Correctly
- Hold each brush with the bristles pointing down.
- Rinse the tips under a gentle stream of lukewarm water, avoiding soaking the ferrule (metal part) and handle. Keeping water out of the ferrule will massively extend the life of your brushes routine.
- Use your fingers to gently squeeze from base to tip to remove surface product before adding cleanser.
Step 3: Lather With Cleanser
- Place a small amount of cleanser on your palm, in a bowl, or on your silicone mat.
- Swirl the brush in small circles to work the product into the bristles, then add a little water to create a rich lather. Focus especially on the base of the bristles—that’s where most residue hides and where how to deep clean makeup brushes really matters.
- For extremely gunky foundation or concealer brushes, let the tips sit in the lather for 1–2 minutes before massaging again.
Step 4: Work on the Cleaning Mat
- Move the brush over different textures and ridges on the mat using circular and back‑and‑forth motions.
- Keep the pressure firm but controlled. Over‑scrubbing can fray natural hair, so the secret to a good deep clean makeup brush routine is “thorough but gentle, repeated as needed” rather than aggressive scrubbing once.
Step 5: Rinse Until the Water Runs Clear
- Rinse the brush again under lukewarm water with the bristles pointing down.
- Gently squeeze from base to tip. If you still see tinted or cloudy water, go back to the lathering step.
- Only stop when the water runs completely clear and the brush no longer feels slippery or slimy. This is the difference between “kind of clean” and a true deep clean makeup brushes result.
Step 6: Squeeze Out Water and Reshape
- Press the brush head gently in a clean towel or microfiber cloth to absorb excess water—never twist, yank, or “wring out” the bristles.
- Use your fingers to pinch the brush back into its original shape (round, flat, angled, etc.). This quick step after you deep clean makeup brushes keeps the head crisp and precise once dry.
- For high‑end natural hair brushes, you can smooth on a tiny amount of hair conditioner after rinsing out the cleanser, then do a final quick rinse. This helps prevent frizz and keeps the bristles feeling soft.
Deep Clean Strategy by Brush Type
Different brushes collect different kinds of product, so your deep clean makeup brush routine should reflect that.
Foundation and concealer brushes
These hold dense, oily formulas that sit directly on your skin. Deep clean them at least once a week—more often if you have acne‑prone or sensitive skin.
Eyeshadow, eyeliner, and lip brushes
Because they touch pigments near mucus membranes and often carry strong color, they benefit from frequent quick cleaning plus a full deep clean makeup brushes session once or twice a week.
Powder, blush, bronzer, and highlighter brushes
These usually handle drier products, so daily color switching with a dry sponge and a full deep clean every 1–2 weeks is often enough for personal use. Pros who work on multiple faces should deep clean them at the end of each working day.
Specialty brushes (gel liner, lip, cream contour)
Any brush used with thick, long‑wear products should be included whenever you deep clean makeup brushes, ideally after each intensive use so the product never hardens at the base of the bristles.
How to Dry Makeup Brushes After a Deep Clean
Deep cleaning is only half of the story. If you don’t dry your brushes correctly, water can seep into the ferrule, weaken the glue, cause shedding, and even lead to mold. Think of drying as the final crucial step in how to deep clean makeup brushes.
Basic Drying Principles
- After squeezing out excess water in a towel, lay brushes flat on a clean, dry cloth with the bristles hanging slightly off the edge of a counter, or tilt them slightly downward.
- Never stand wet brushes upright with bristles facing up. Gravity will pull water into the ferrule and handle, undoing the benefits of your deep clean makeup brushes routine.
- Let brushes air dry in a well‑ventilated, shaded area. Avoid placing them directly on a radiator, in direct sunlight, or under very hot air—high heat can warp synthetic fibers and dry out natural hair.
Useful Drying Tricks
- A brush tree or drying rack that holds brushes upside‑down is ideal. It allows water to drain away from the ferrule and keeps the reshaped heads neat.
- Dense kabuki and large powder brushes can take 6–12 hours to dry fully, so plan your deep clean makeup brushes session for the evening and let them rest overnight.
For a detailed, dedicated guide to safe and fast drying methods—including timing by brush type, travel‑friendly drying setups, and common drying mistakes—link readers to your secondary pillar page on how to dry makeup brushes properly.
❗ Common Mistakes That Ruin Deep Clean Makeup Brushes
Avoid these habits if you want your brushes and your deep clean makeup brush routine to pay off long‑term.
- Soaking brushes in a sink or bowl
Leaving brushes standing in water or cleanser allows liquid to flood the ferrule and handle, loosening glue and encouraging rust or mold. Always focus on flowing rinses, not long soaks. - Using very hot water or high heat
Hot water and hot blow‑dryers can kink synthetic bristles and make natural hair rough and brittle. Stick to lukewarm water and cool to low airflow. - Scrubbing too hard
Over‑scrubbing on towels or rough mats will fray bristles and destroy precise shapes. Proper how to deep clean makeup brushes technique relies on repetition and patience, not brute force. - Putting damp brushes back into closed bags
Storing brushes while even slightly damp traps moisture and invites bacteria and mildew. Always make sure every brush from your deep clean makeup brushes session is completely dry before packing it away.
Final Check and Long‑Term Routine
Once you’ve followed all these steps, you’ve completed a full how to deep clean makeup brushes routine—from sorting and soaking to deep cleansing and safe drying. The last piece is building this into your schedule so your brushes stay consistently clean.
After each deep clean, quickly check:
- Are the bristles completely dry and free of residue?
- Does the brush head keep its shape and feel soft, not stiff or sticky?
- Is the ferrule firmly attached with no wobbling or cracking on the handle?
If a brush fails any of these checks even after you deep clean makeup brushes, it may be time to replace it.
Commit to a regular deep clean makeup brush routine—weekly for cream and liquid brushes, every 1–2 weeks for powders, and daily deep cleans for high‑risk pro tools. Combined with the right drying techniques and occasional quick‑cleaning between uses, how to deep clean makeup brushes becomes the foundation of a more hygienic kit, smoother application, and happier skin every time you sit down to do makeup.