
Deep cleaning is only一half of brush hygiene; knowing how to dry makeup brushes correctly is just as important as washing them. Dry them the wrong way and you get frizzed bristles, shedding, warped shapes, and even mold inside the ferrule. Dry them the right way and your brushes stay soft, fluffy, and ready to blend like new for years.
This guide shows you exactly how to dry makeup brushes step by step, how to speed things up without damage, common mistakes to avoid, and recommended drying times for different brush types.
Why Drying Matters So Much
Before getting into the how‑to, it helps to understand why how to dry makeup brushes is such a big deal.
- Water that seeps into the ferrule (the metal part) can weaken the glue that holds the bristles, leading to early shedding and wobbly brush heads.
- Drying brushes upright or in a closed, humid space encourages bacteria and mold, completely undoing the benefits of cleaning.
- Overheating wet bristles with hot air can warp synthetic fibers and make natural hair dry, rough, and scratchy.
Before drying, make sure your brushes are thoroughly washed. For a full step‑by‑step washing routine, check our main guide on how to clean makeup brushes.
Treat drying as the “finishing step” of your cleaning routine, not an afterthought.
Basic Setup: What You Need
A safe how to dry makeup brushes setup is simple, but a tiny bit of planning makes a big difference.
- Clean, absorbent towel or microfiber cloth
Used to blot out excess water and to support brushes while they dry. - Flat, ventilated surface
A countertop, desk edge, or shelf where brushes can lie flat with the heads slightly off the edge for airflow. - Optional: drying rack / brush tree
Holds brushes upside‑down so water drains away from the ferrule. Ideal for pros or anyone with lots of brushes. - Optional: fan or gentle airflow
A small desk fan or a spot near an open window can cut drying time dramatically—as long as the air isn’t hot or dusty.
If you already have a full “how to deep clean makeup brushes” routine, just add this drying setup right after rinsing.
✨ Step‑by‑Step: How to Dry Makeup Brushes
Follow this workflow every time you wash your brushes.
Step 1: Squeeze Out Excess Water
- Hold the brush with bristles pointing down
- Use your fingers to gently squeeze from the base toward the tip, pressing out as much water as you can without yanking or twisting the bristles.
- Never pull the bristles sideways or wring them like a towel; this can loosen them at the base.
Removing as much water as possible up front is the fastest way to improve how to dry makeup brushes efficiently.
Step 2: Blot on a Towel
Lay a clean towel or microfiber cloth flat, then:
- Place the brush head on the towel and gently roll or press to absorb moisture.
- Repeat for each brush until the towel no longer picks up obvious water.
- If the towel becomes very wet, switch to a dry section or a second towel.
This step not only speeds up drying but also removes leftover cleanser from the outside of the bristles.
Step 3: Reshape the Brush
Proper reshaping is a small detail that makes a big impact on how to dry makeup brushes without ruining their performance.
- Use your fingers to mold the damp bristles back into their original shape: round, flat, angled, tapered, or fan.
- Smooth down any stray hairs and make sure the brush head looks symmetrical.
- For very fluffy powder brushes, lightly “fluff and pat” so the dome is even.
If you use brush guards, slide them on now while the bristles are still damp and shaped.
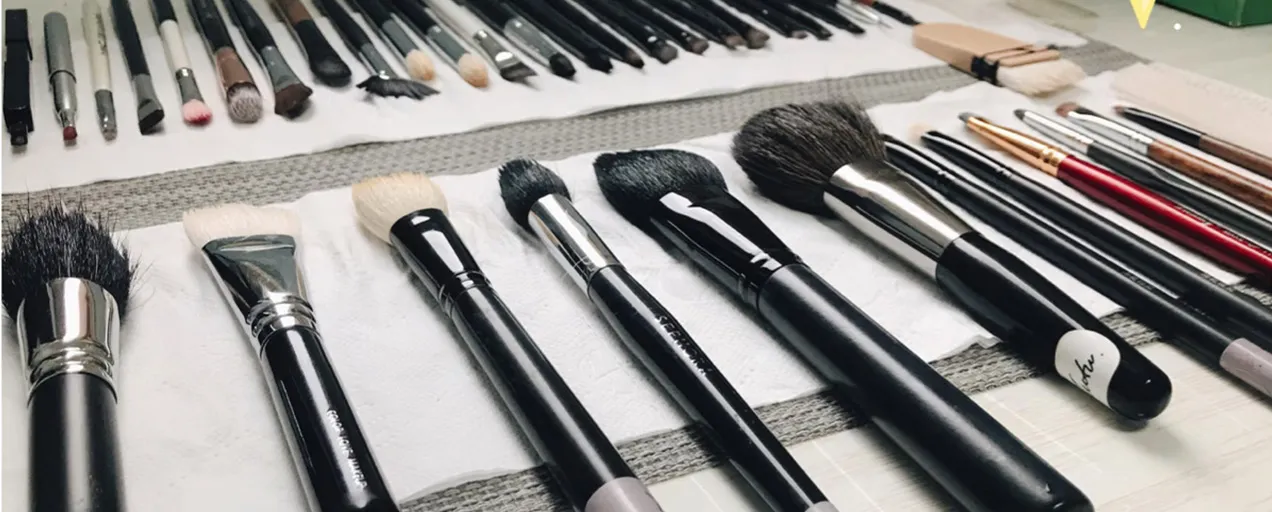
Step 4: Position Brushes for Drying
This is the most critical part of how to dry makeup brushes safely.
Best options:
- Flat on a towel, bristles over the edge
Lay brushes horizontally on a folded towel with the handles on the towel and the heads slightly over the edge of the counter. This allows air to circulate all around the bristles while keeping water away from the ferrule. - In a drying rack / brush tree, bristles down
If you own a brush tree, place each brush upside‑down so water can drip out of the bristles instead of into the handle. This is ideal for dense face brushes.
Avoid:
- Standing brushes upright in a cup with bristles facing up while they are wet. Gravity will pull water into the ferrule and handle.
- Laying brushes on a completely flat surface where the bristles are pressed against the counter—this traps moisture and can flatten one side of the brush.
Step 5: Choose the Right Drying Environment
Where you put your brushes affects how well you actually dry makeup brushes.
- Choose a space that is dry, shaded, and well‑ventilated, such as near an open window (without direct sun on the brushes).
- Avoid bathrooms right after showers—steam and humidity slow drying and encourage bacteria.
- You can place a small fan several feet away, set to low or medium. Aim for gentle airflow across the brushes, not directly blasting the bristles.
Let them dry completely before using or storing them.
Special Note for Natural Hair Brushes
If you use natural hair brushes, be extra gentle when you dry makeup brushes, because natural bristles are most fragile while they are wet. A simple way to protect them is to lightly reshape the damp bristles with your fingers, then slide on a breathable brush guard and let them dry flat or bristles‑down so the head stays smooth instead of frizzy.
When a natural hair brush dries out of shape, a quick fix is to use a little steam from a garment steamer at a safe distance, then pinch the bristles back into place and let them cool, but this should be done carefully and only occasionally.
For a full routine focused only on natural hair tools, see our dedicated guide “How to Properly Wash and Dry Natural Hair Makeup Brushes (Stop Ruining Them)”
How Long Do Makeup Brushes Take to Dry?
Drying time depends on brush size, density, hair type, and your environment. Use these ranges as a practical guide when planning how to dry makeup brushes.
| Brush type | Hair type | Typical drying time* |
|---|---|---|
| Small eye brushes | Synthetic | 1–3 hours |
| Small eye brushes | Natural hair | 2–4 hours |
| Medium face brushes (blush) | Synthetic | 3–6 hours |
| Medium face brushes (blush) | Natural hair | 4–8 hours |
| Dense foundation / kabuki | Synthetic | 4–8 hours |
| Dense foundation / kabuki | Natural hair | 6–12+ hours |
| Large loose powder brushes | Mixed / natural | 8–12+ hours |
*Assumes a dry, ventilated room and proper squeezing/blotting. In humid climates, add a few extra hours.
Pro tip: Plan major washes in the evening. That way you can dry makeup brushes overnight and wake up to a fully clean, dry kit.
Fast‑Drying Methods (Without Damaging Brushes)
Sometimes you don’t have all night—especially if you are a working artist or have back‑to‑back events. Here are safer shortcuts for how to dry makeup brushes fast.
- Maximize blotting
Spend a bit longer gently pressing the bristles in a towel to remove more water before you set them down. The drier they are at the start, the faster they finish. - Use a fan, not a hair dryer
A fan moves air without adding heat. Position brushes in front of a fan on low or medium speed; this can cut drying time by a third or more. - Cool or low heat only, from a distance
If you absolutely must use a hair dryer, keep it on the coolest or lowest‑heat setting, 30–40 cm away, and constantly move it. Never concentrate hot air at one point. - Prioritize small, high‑use brushes
Dry eye, lip, and concealer brushes first—they’re the ones that most affect hygiene and precision. If time is limited, have duplicates of your most‑used brushes so one set can dry while the other works.
Even when you are in a rush, remember: no soaking heat and no direct hot air on bristles.
We generally do not recommend using a hair dryer to dry makeup brushes, because high heat and very strong airflow can damage the bristles and weaken the glue in the ferrule. If you are really in a hurry, you should only use a hair dryer as a short, gentle boost after towel‑drying—then let the brushes finish air‑drying naturally. For a step‑by‑step emergency routine, see our guide “How to Dry Makeup Brushes with a Hair Dryer (Without Destroying Them)”.
Common Drying Mistakes to Avoid
If your brushes are shedding, splaying, or smelling odd, chances are your how to dry makeup brushes habits need a tweak. Watch out for these pitfalls:
- Drying brushes upright in a cup
Water runs straight into the ferrule and handle, loosening glue and causing rust or mold. - Storing brushes before they’re fully dry
Packing damp brushes into a closed pouch or drawer traps moisture, creating a perfect environment for bacteria and mildew. Always wait until they feel completely dry at the base of the bristles. - Blasting with hot air
Strong heat bends synthetic bristles and makes natural hair brittle. It can also melt or soften glue in the ferrule. - Pressing bristles flat while drying
Leaving brush heads squashed against a surface while wet can permanently distort their shape and ruin their blending performance. - Drying in direct sunlight
Sun can fade bristles and dry them out unevenly, especially natural hair brushes.
Avoiding these mistakes is just as important as knowing the correct steps.
For a full comparison of different fast‑drying setups and their risks, read: How to Dry Makeup Brushes Fast (Without Damage).
Connecting Drying With Your Full Brush Care Routine
Drying doesn’t exist in isolation—it’s the bridge between washing and safe storage. To get the most out of your routine:
- Pair this how to dry makeup brushes guide with a solid “how to deep clean makeup brushes” routine so bristles are truly clean before you worry about drying.
- Build a regular schedule: for example, deep clean and dry all face brushes every week, all eye brushes every 5–7 days, and your full professional kit at the end of each working day.
- Keep two sets of must‑have brushes if you wear makeup or work on clients daily. That way, one set can be drying while the other is in use.
When you combine thorough washing with smart drying and thoughtful storage, how to dry makeup brushes becomes more than a chore. It becomes an easy, repeatable system that keeps your tools hygienic, your makeup smoother, and your skin happier—day after day.